LG G Watch – The Ultimate Guide

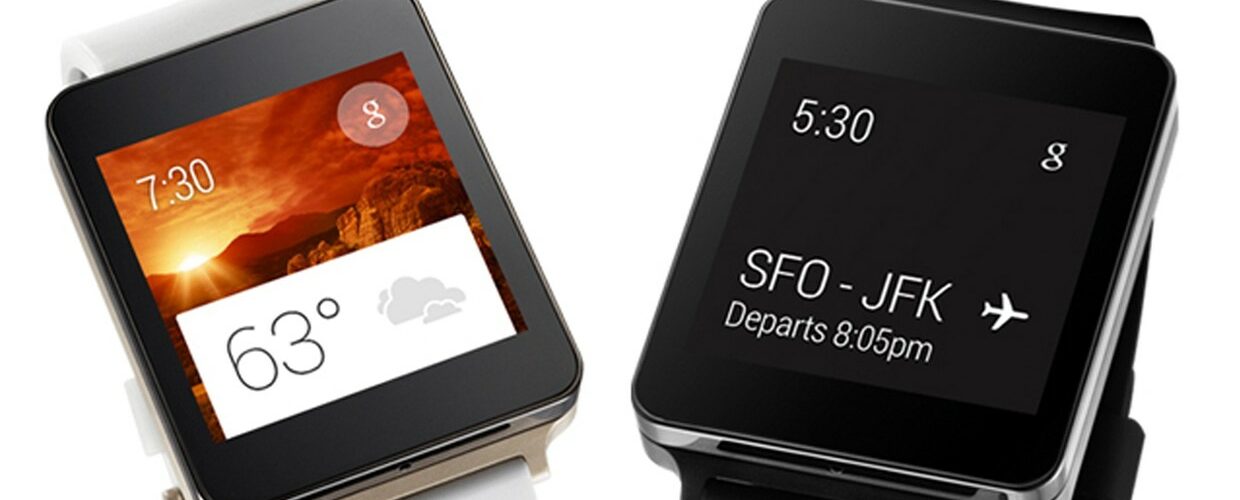
A lot of people still own and love their LG G Watch and so do I. That tiny thing is easy to flash, nearly unbreakable and all in all solid built meaning it’s easy for us flashers, rooters and hackers to tinker around as we like without breaking too much.
I’ve decided to create a little overview-post to show which ROMs, kernels and recoveries currently exist, which the better ones are (in my opinion) and what you should do to enhance your Android Wear experience a lot.
Overview
Here’s a quick overview about every section I’ll cover in this post:
- Drivers
- Quick ADB and Fastboot Guide
- Tools
- Install APK/Apps
- OTA Updates
- ROMs
- Kernel
- Recovery
- Missing something?
Drivers
Probably the most asked question about the LG G Watch is: Drivers. I have to admit that these are kinda hard to find if you’re not familiar with any ADB related stuff, especially when using “weird devices” where they won’t provide such things out of the box or on their website.
Anyways, long story short use the package provided here: 15 seconds ADB Installer
When installing the drivers above say yes when being asked to install standard ADB drivers. Do the same for the globally installed ADB commands because it’ll make all your tasks from now on a little bit easier.
If your watch still won’t be detected by your PC open the device manager, right-click on the unrecognized device and choose to update the driver. Once there choose the option to search for drivers on your PC, select the “from list” option and search for either “Google”, “Android” or anything like that. (Sorry, can’t give a full step-by-step tutorial here since I’m using a german Windows system).
Quick ADB and Fastboot Guide
READ BEFORE TRYING ANYTHING ON YOUR WATCH
You need to unlock your bootloader before doing any custom work on your LG G Watch. This can be achieved by connecting your watch to your PC and using the “fastboot oem unlock” command while in fastboot mode. To boot your watch into fastboot mode reboot it and once the LG logo comes up swipe from the upper left to the lower right corner.
Most of us need certain ADB commands to get things working on our LG G Watch such as a custom recovery, kernel or even ROM. Most of these bring tiny instructions with them but they aren’t always that great or steps are simply not explained anymore because once done it seems easy for those who did it already yet for beginners it’s probably still something that’ll take them a few minutes. Some people even broke their LG G Watch during such a process which, of course, is something we’d never want in any way happening here.
Here’s a quick overlook at all the most important ADB commands you’ll most likely find on XDA threads or simply by searching around, just that these here are on one neat little place ;)
Enable Debugging Mode
In order to use most of these commands you’ll need to enable Debugging mode. To do so open the settings on your LG G Watch and go to “Info“. Tap multiple times on the “Build-Number” till a message appears saying that you’re a developer now. Go one step back and you’ll see a new option appearing at the bottom of the menu. Go there and enable “ADB Debugging“. You should now be able to connect the LG G Watch to your PC.
List all connected ADB devices
adb devices
Install APK files
adb install filename.apk
Reboot into Bootloader (to use fastboot commands below)
adb reboot bootloader
Reboot into Recovery
adb reboot recovery
Push file onto your device
adb push pcpath devicepath
Pull file from your device
adb pull devicepath pcpath
Change Screen Density (default is 240)
adb shell wm 240
Unlock Bootloader (probably voids warranty)
fastboot oem unlock
Lock Bootloader (probably restores warranty but unconfirmed!)
fastboot oem lock
Reboot to Android from fastboot mode
fastboot reboot
Flash Kernel (needs unlocked bootloader)
fastboot flash boot kernelimagename.img
Flash Recovery (needs unlocked bootloader)
fastboot flash recovery recoveryimagename.img
Turn OTA update notifications off (you need root for this)
adb shell su -c pm disable com.google.android.gms/.update.SystemUpdateService
adb shell su -c pm disable com.google.android.gms/.update.SystemUpdateService$ActiveReceiver
adb shell su -c pm disable com.google.android.gms/.update.SystemUpdateService$Receiver
adb shell su -c pm disable com.google.android.gms/.update.SystemUpdateService$SecretCodeReceiver
adb shell su -c pm disable com.google.android.gsf/.update.SystemUpdateActivity
adb shell su -c pm disable com.google.android.gsf/.update.SystemUpdatePanoActivity
adb shell su -c pm disable com.google.android.gsf/.update.SystemUpdateService
adb shell su -c pm disable com.google.android.gsf/.update.SystemUpdateService$Receiver
adb shell su -c pm disable com.google.android.gsf/.update.SystemUpdateService$SecretCodeReceiver
Tools
Probably the most important section before doing anything with your watch. The tools listed here will help you to restore, root, flash, etc. your LG G Watch and can act as a lifesaver in certain situations.
| Name | Description | Download |
|---|---|---|
| LG G Watch Tool | An application with a simple name yet very handy. This is the #1 tool when it comes to unlocking the bootloader, rooting, flashing a custom recovery or returning to a stock Android Wear watch. | XDA |
| Return to Stock | A simple script to completely restore your LG G Watch back to stock. | XDA |
| WinDroid Universal Android Toolkit | Another simple tool to unlock your bootloader, flash a custom recovery and so on. This time featuring a GUI! | XDA |
| Android Wear APK Tools | A handy and quick little tool when installing or uninstalling custom apps onto your watch. | XDA |
Install APK/Apps
Android Wear isn’t named “Android” for no reason, it’s basically a tiny version of your Android smartphone small enough to fit on your wrist. That thing is even powerful enough to drive a Playstation 1 emulator at almost full speed! And it’s not even that hard to put different apps you daily use on your smartphone to good use on your Wear device. However keep the tiny resolution, battery and hardware in mind as most things will either look ugly, won’t work at all or crash a lot on Android Wear.
Here’s a detailed guide on how to put your favorite apps onto your Wear device: Un/Install Sideloaded Android Wear Apps
And here’s a list of apps confirmed working (and more): Android Wear: Working Sideloaded Android Wear Apps
OTA Updates (may not be complete and/or in order)
OTA stands for “Over the Air” and is used to push live updates out to almost any Android device, not only watches. But you won’t always get OTA updates, as example when using a custom ROM or, in some cases, even kernels. A manual install will most likely overwrite your custom kernel, recovery and ROM so be careful at what you do here if you don’t want to mess things up. However, you can always easily restore your watch once you done goof’d by using one of the tools provided above this section, as example the LG G Watch Tool.
Before flashing/sideloading any of these packages provided here make sure you’re on the mentioned before-build. Flashing an OTA update onto the wrong build number can result in things breaking or not working anymore. To do so go into your Android Wear settings and select the “Info” option. Scroll down a bit and you should see a “Build-Number“. If this build number is correct with the below mentioned one you can flash these packages without things breaking (hopefully, of course there’s always a rest risk).
| Before | After | Release Date | Download |
|---|---|---|---|
| KGW42Q | LWX48P | ??? | Google DropBox OneDrive |
| KNX01Q | LWX48P | ??? | Google DropBox OneDrive |
| LDZ22D | LCA43 | around 22. August 2015 | Google DropBox OneDrive |
| LCA43 (???) | MEC23G | around 17. January 2016 | Google DropBox OneDrive |
Source: LG G Watch XDA Wiki, XDA LG G Watch Stock OTA URLs and my own research
ROMs
The stock ROM provided when you bought your LG G Watch does its job great already but sometimes you just want to get a bit more out of it. As example a longer lasting battery or smoother interface. ROMs are one way to achieve these customizations since most of them add a custom kernel which allows more cores to operate at the same time and slightly overclock the watch. This results in the watch running smoother and even longer since threads running on the watch won’t take as long to finish as with the stock one. This however started a long lasting debate of “Is this really real?” or “Is there any improvement at all?” over on many forums, not only for the LG G Watch but also for many different Android phones. While the logic seems, yeah, logical it’s not always the case as example when using the device for a long time but that’s a whole other discussion and not part of this guide ;)
| Name | Description | Download |
|---|---|---|
| Mysterious Magic | A great and fast ROM using a custom kernel made by invisiblek to enhance your Android Wear experience a lot. | XDA |
| Ghoma ROM (OUTDATED) | Once a great ROM but sadly development seems to be stopped. I suggest to use other ROMs but try it if you want. | XDA |
| Graphene ROM | XDA |
Kernel
Instead of flashing a whole new ROM onto your watch you can first try a custom kernel. This way you can gain a better experience by not resetting your watch completely. Most of these custom kernels bring you a smoother experience by turning on all cores and overclocking them slightly giving you a better battery life and smoother experience. Best of both worlds, right?
| Name | Description | Download |
|---|---|---|
| invisiblek | One of the best kernels out there for the LG G Watch so far, also used by most custom ROMs. My recommendation for everyone wanting to flash a custom kernel! | XDA |
| arter97 | Another great custom kernel, most likely on the same level as invisiblek’s one. Choose one of both, there’s no bad choice here. | XDA |
Recovery
The stock recovery on its own is good enough to format the watch for a fresh experience as example when using a new kernel or a new ROM. However for more advanced stuff like flashing a new ROM or updating kernels it’s far too limited.
To flash a recovery refer to the “Flash ROM/Kernel/Recovery” section
OTA Updates are only possible via the unmodified stock recovery (as of this day). The OTA packages check for things that no custom recovery provides yet. You can go back to the stock recovery by using the LG G Watch tool mentioned in the “Tools” section above.
| Name | Description | Download |
|---|---|---|
| TWRP | Probably the best choice for tiny screens. Flash new ROMs or even Kernels via a neat little GUI, even features a full keyboard and File Manager to modify files or backups. | XDA |
| Clockworkmod Recovery (UNOFFICIAL) | Text-Based recovery, not as neat and feature-packed as TWRP tho but does its job well. | XDA |
Missing something?
Missing a specific thing here in this ultimate guide? Or is something wrong here? I love feedback of any kind so don’t be shy and either send me a mail at epiclper7@gmail.com, post a comment under this post or leave a reply over at the XDA Forum Thread!


You should mention Asteroid OS, which has pretty good support for this watch.
https://asteroidos.org/install/dory/
“Most of these custom kernels bring you a smoother experience by turning on all cores and overclocking them slightly giving you a better battery life and smoother experience. ”
Turning on all cores and overclocking the CPU will give a better battery life? How is that possible?
From experience. The watch can do tasks faster and you won’t have to leave it on for as long to wait for a task to finish, thus you’ll save a bit of battery by that.